(also called passe-partout/passepartout presentation*)
We do not have access yet to most archival matting and framing materials readily available in other countries. This method takes that into account and uses what can be found in school and art supplies stores.
Please excuse the quality of the video. One of the reasons I have not gone into video demos yet. Phone’s camera has the tendency to adjust constantly resulting in a pulsating video. Will replace this once I have a better sample done.
The video will give you an idea though of what the front, side and back looks like for this mounted display.
Advantages:
Presentable way to display an unframed artwork.
Economical – costs less than framing with glass.
You can offer the artwork sans framing cost.
Clients or buyers have the option to frame in the style they prefer
Safer to ship or transport.
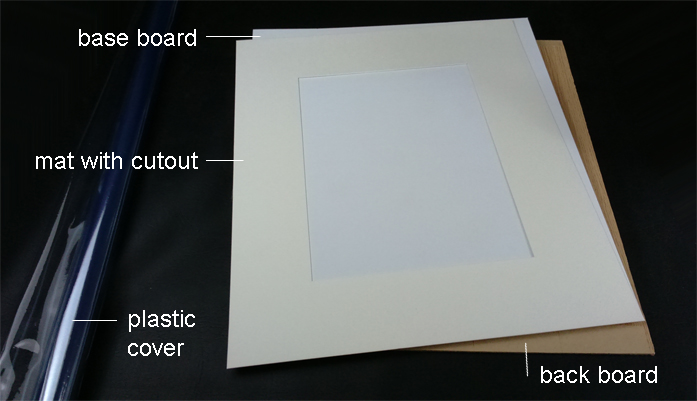
Materials you will need
mat board
base board – Sintra board, foam core, or acid free board
back board (plywood or thick paper board)
clear plastic cover
box cutter
acid free tape or gummed paper tape
2″ clear tape
scrap of acid free watercolor paper
First things first. Measure.
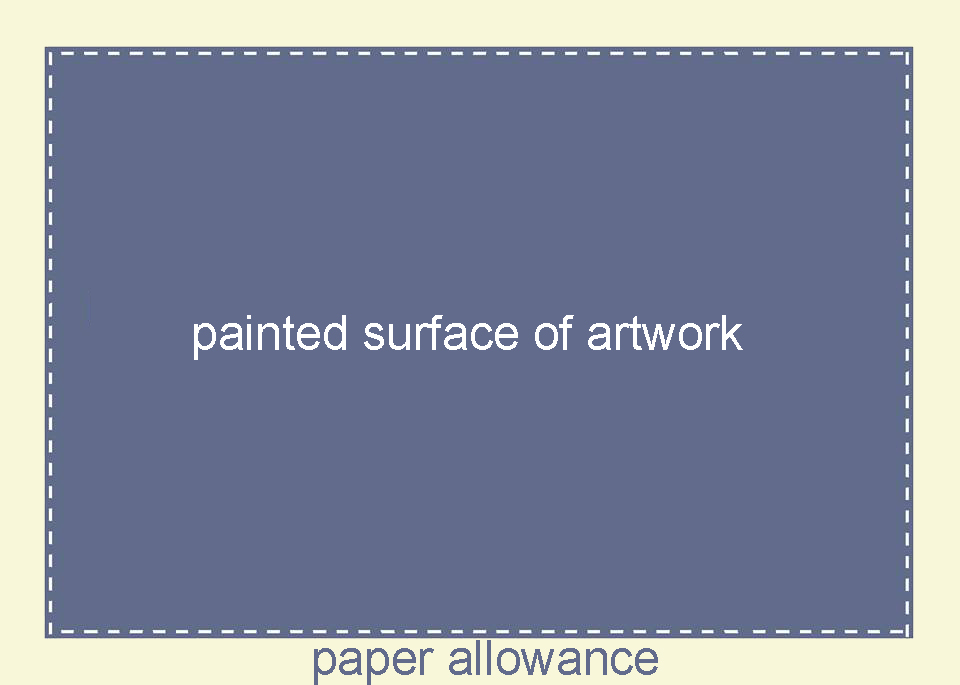
Painting dimensions
Get the painting’s dimensions. This area is what will show in the mat window and is often the one recorded in catalogs or referred to in publications as part of the painting’s description and identification. This area is the painted part of the paper – your actual painting sans border allowances – and is usually expressed in inches or in centimeters.
Tip: when shortening the size units, for inches use in instead of ” and for centimeters cm instead of ‘ .This minimizes the chance of mislabeling or misreading them because the signs are smaller and are harder to distinguish specially for those with diminished visual acuity.
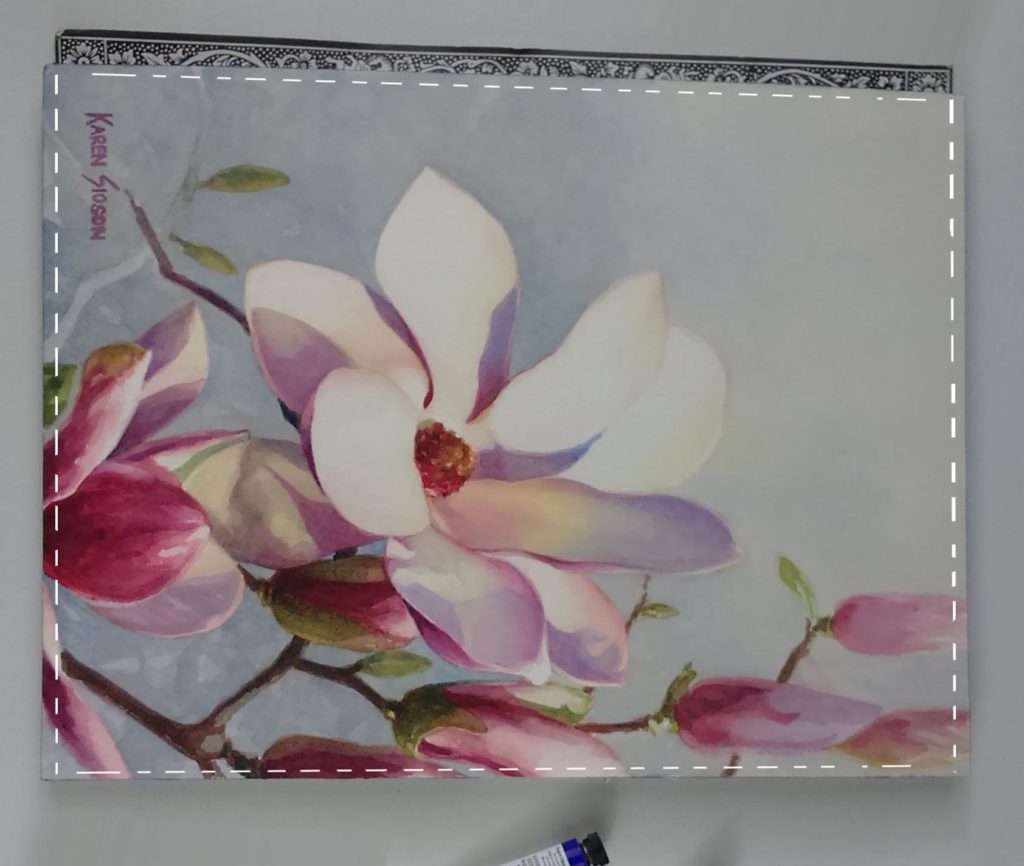
Some artists, specially when using watercolor blocks, paint to the edge of the paper. If planning to frame with mat, measure the dimension that takes into consideration the allowance for the mounting. A few millimeters (mm) subtracted all around should be enough for mounting use. The mat should be able to hold onto some portions of the painting’s edges to secure them. Otherwise, the painting’s edges would pop out through the cutout.
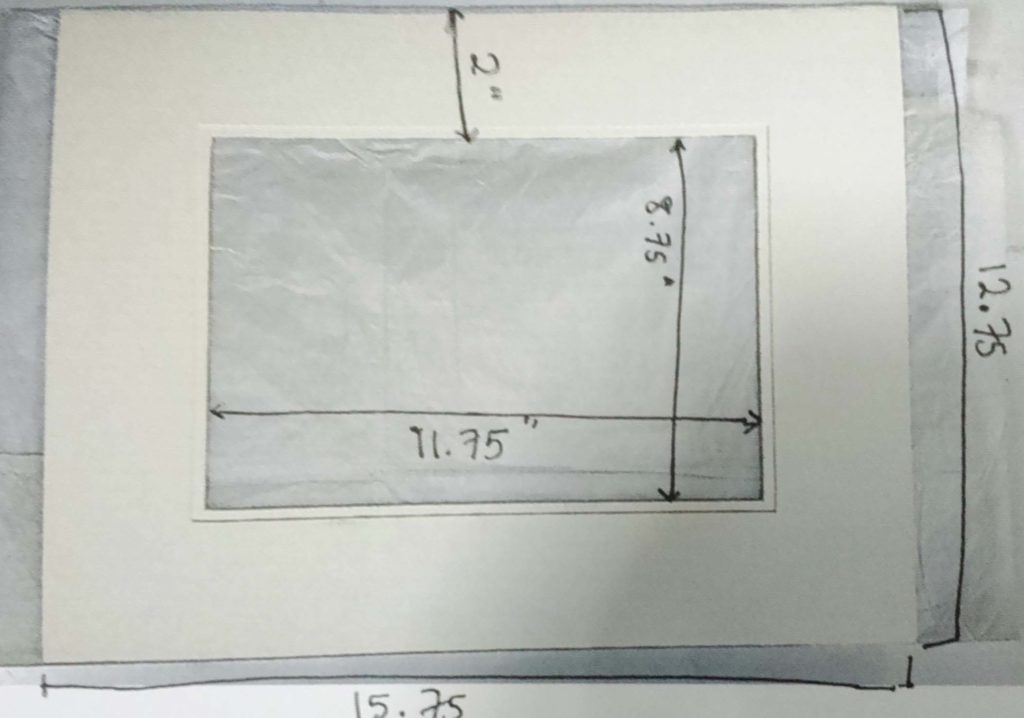
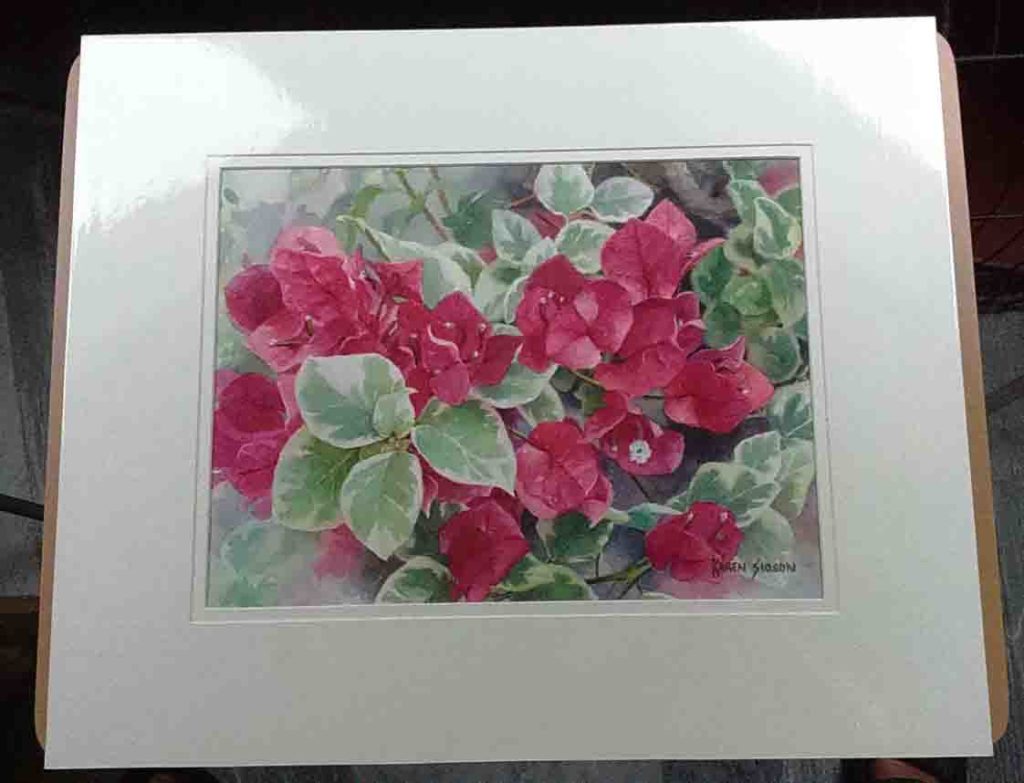
Using this painting done on a 9 x 12 inch block as an example, it would have the painting dimension at 8.75 x 11.75 inches even though the whole paper size is 9 x 12 inches.
How to order or size your matting
The mat sidings depend on your preference and is usually even for all sides. In the illustration, I made it 2 inches on all sides. When you order your mat and backing, you can go narrower or wider. Specify your desired external dimension and the size of your mat window or cutout.
For example:
External dimension is 12.75 x 15.75 inches. Mat Window is 8.75 x 11.75 inches
The craftsman will know to center your opening and make the siding widths even.
The base or mounting board and the backboard or back panel should have the same external dimensions as that of the matting.
If you are making the mat from scratch, you can buy matting boards from school supplies. I would suggest you do not use illustration board as the black part has a tendency to come off and stain surfaces.
Attach your painting to the mount board
The mount board, also called base board, is the backing where you attach the artwork. Ideally made of 100% acid free cotton rag, if you have no access to that, you can use sintra board or foam core temporarily. The principle is to keep your artwork from getting into direct contact with wood which may cause discoloration by extended contact.
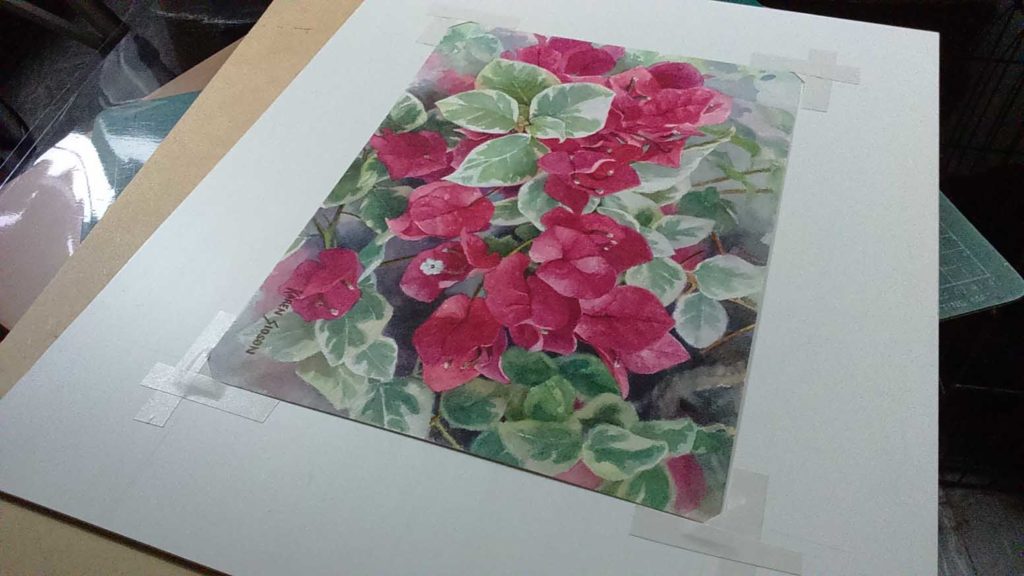
To center your painting on the base board. Place the painting on the board and put the passepartout on top of it Through the cutout, move the painting til you are satisfied with the position. Carefully place a weight on the painting so it will not move while you remove the passepartout off it.
DIY Archival (reversible) mounting
The idea is to attach the painting without doing irreversible change to it. This method allows you to take out the painting later without any adhesives or damages to it.
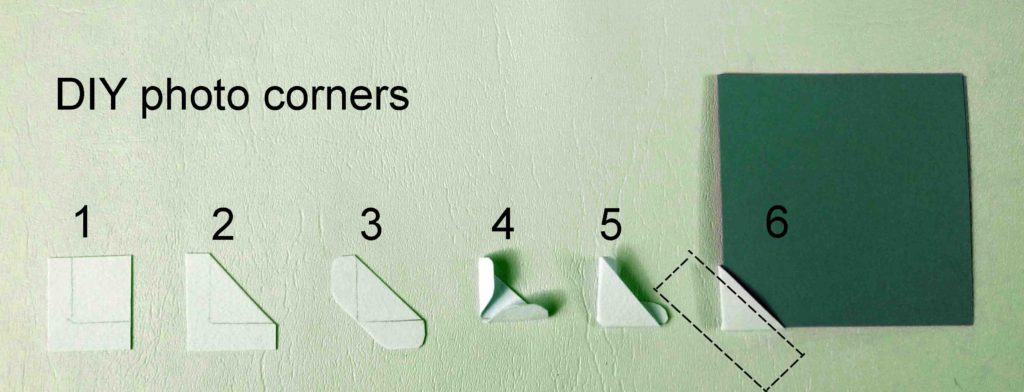
I made DIY photo corners from scraps of acid free watercolor paper left from previous paintings.
Steps for the photo corners.
Cut a square. Mark a smaller square inside it flushed to two sides using a pencil.
Cut like in the illustration.
Cut again on the other side. Round the pointed edges a bit.
Fold following the pencil marking.
Turn it over.
Place this on one corner of the painting. Tape on the dotted line. Make sure not to get tape on the painting. You may want to reinforce this with a vertical and horizontal tape.
Size the photo corners so it will not show in the cutout.
Ideal to use acid free paper tape to hold the painting corners in place. You only need to secure the corners because the passepartout will do the job later of keeping the sides of the painting anchored in place.
Check again by placing the mat with window on if you have good placement before proceeding to the next step.
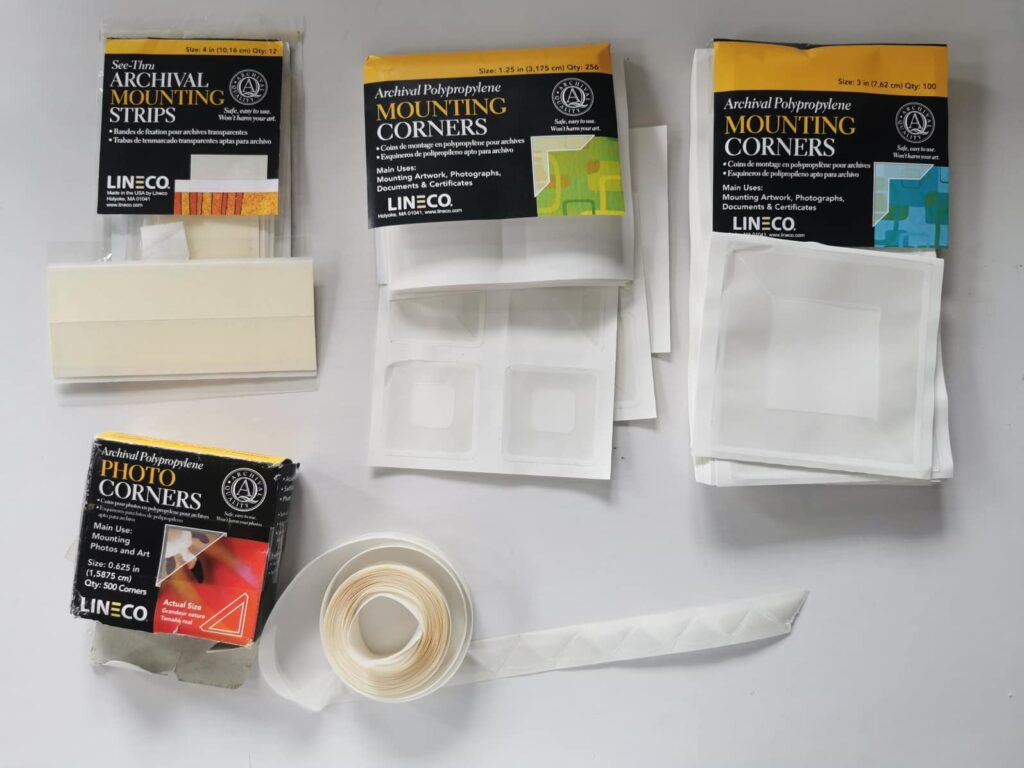
Commercially available mounting strips and corners
You can buy acid free photo corners made from polypropylene plastic. These come in different sizes. Choose depending on the size of the paper you will mount.
If you are in the Philippines, you can order these through galleon.ph. Takes a few weeks to get here but worth the wait. Check current prices online. Find people to share a single box with. It will not seem so expensive.
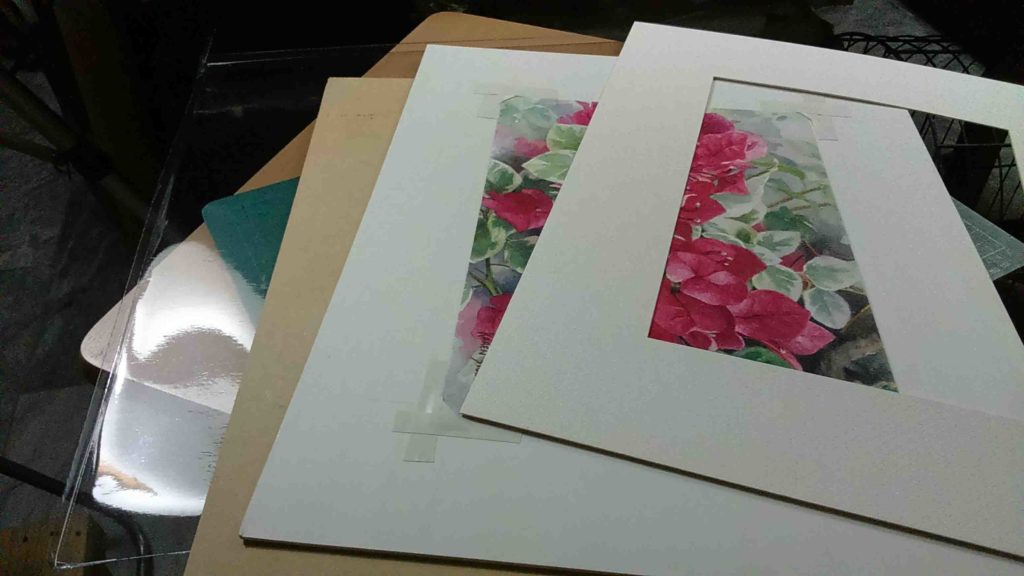
Putting it all together with plastic cover
One option is to tape all the layers together but I prefer keeping them free and use this method instead to keep them locked in place.
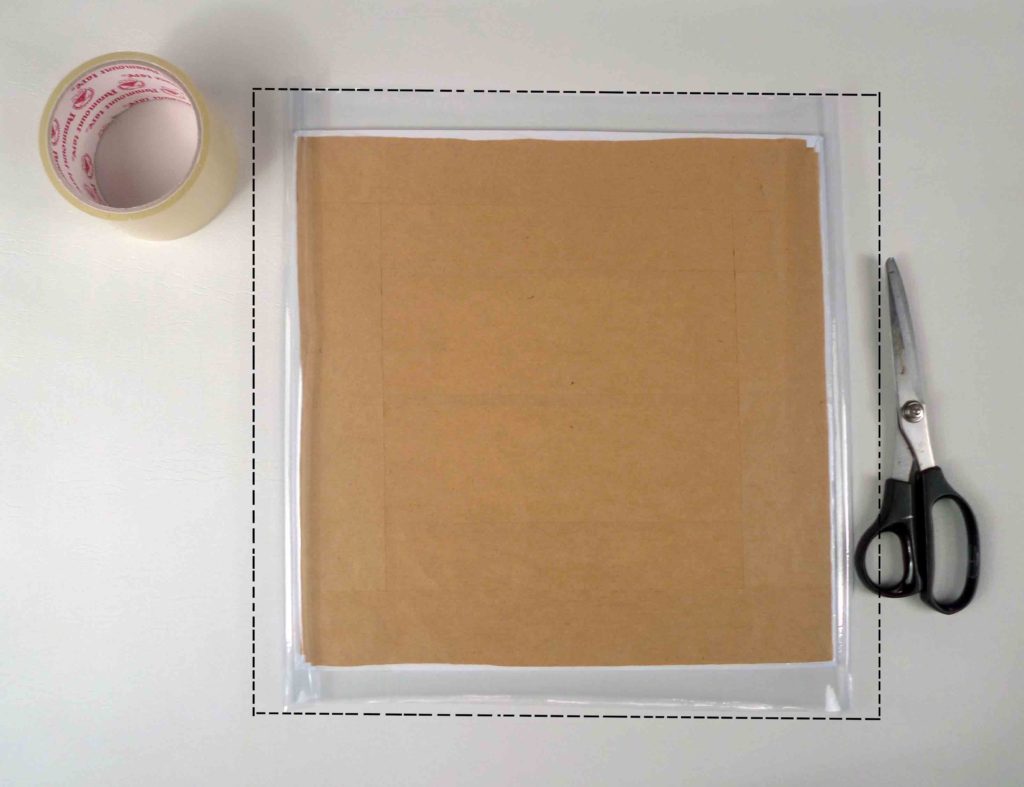
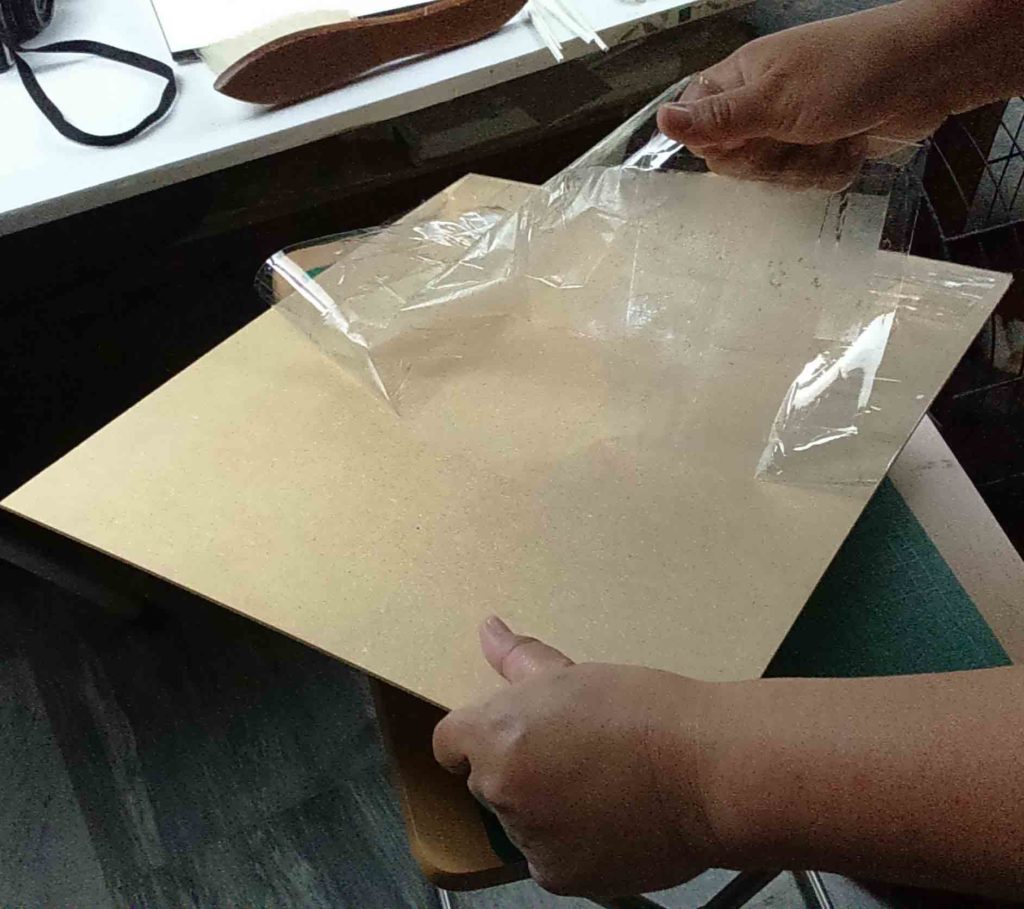
I get the thicker or heavier clear book cover plastic when I have a chance. Clean the plastic surfaces of course then using the back board (plywood support) as template, cut the plastic sheet giving about 1.5 inches clearance all around.
Layering goes like this. On the bottom, the plastic followed by the passepartout with the right side facing down. After that, your painting on the mount board also facing down. Finally your back cover (plywood.)
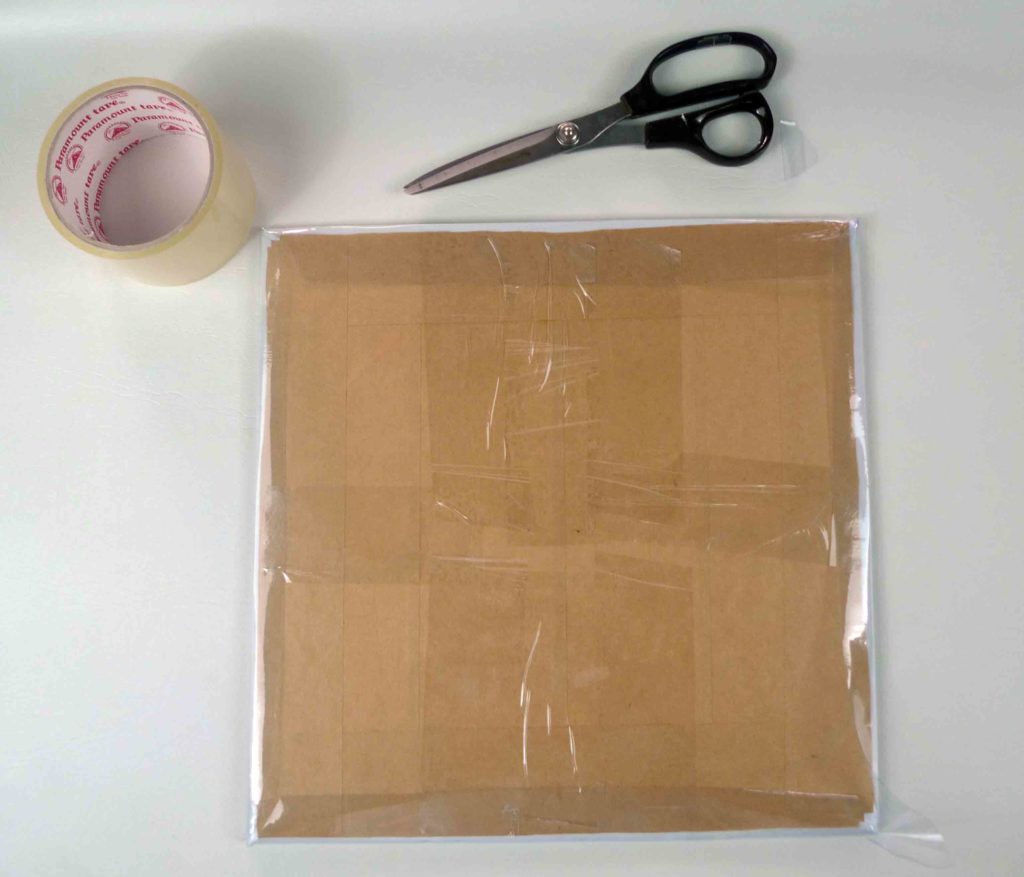
Use clear tape so the backing looks neat. I use a 2 inch clear packaging tape which I cut about 4-5 inches long per strip. Your first application should follow a cross pattern. Tape the plastic at the middle parts of each side making sure only to catch the flaps at the back. Apply a gentle pressure as you try to smooth the plastic at the front. I usually work on opposite sides to even out the pressure. Work taping from the center outwards. Make the corners neat by tucking one end over the other.
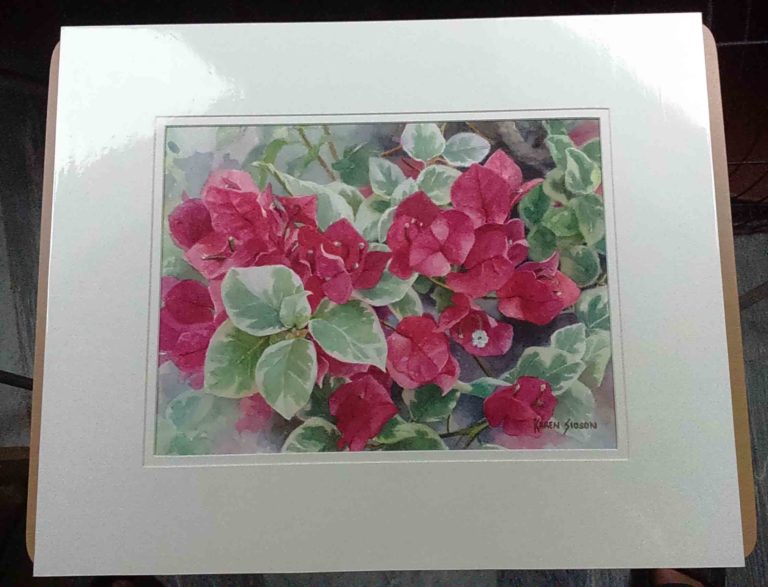
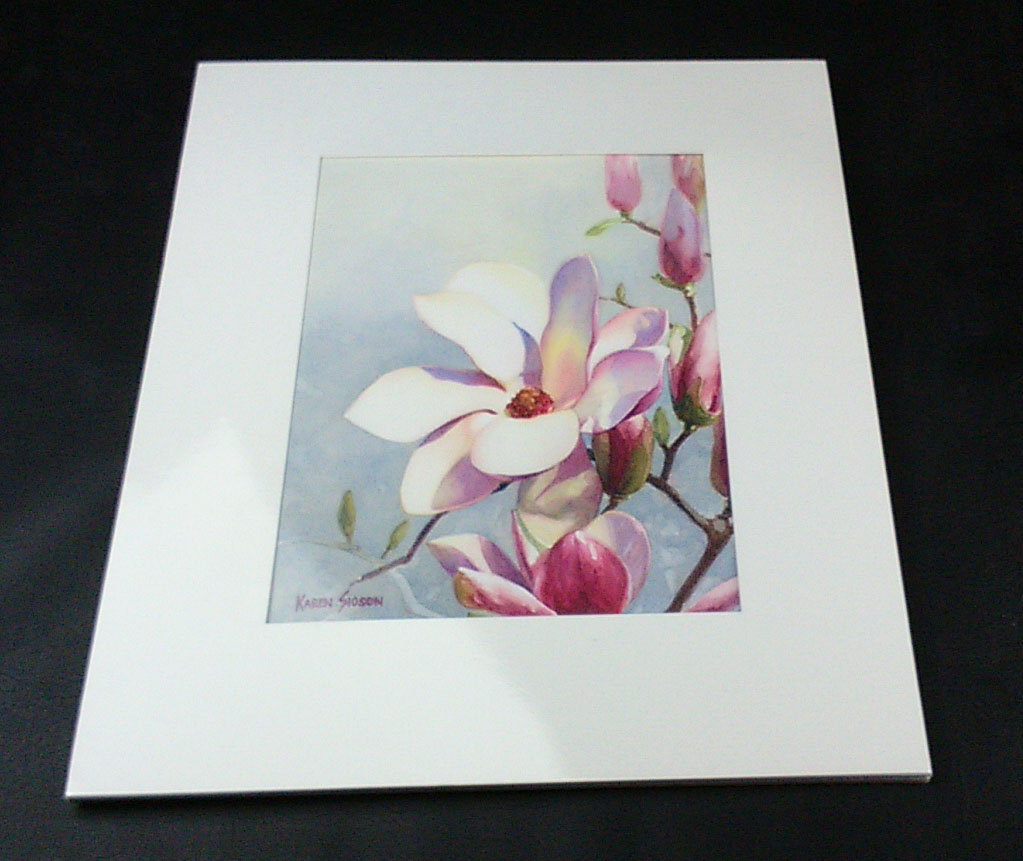
You can order mat with cutout, base board and backboard prepared to your specification from any framer. Sample shows presentation with double matting done for a client. I did the archival mounting on the inside. She brought the prepared set to the framer. Just had them remove the plastic cover. The framer inserted the set into the wood frame and glass cover of her choice.
Sets of mat with cutout and thin plywood or laminate board as backboard can also be ordered in Recto, Divisoria or Quiapo. They give discounts when you order by the dozen. I usually bulk order sets custom sized to my watercolor paper blocks.
Acid free base boards, sintra boards, foam core
When in Manila, the acid free cotton rag board can be sourced at Trebs in Pasay City. Sintra is available at signage shops and some art stores. Foam core, at selected school supplies and art shops.
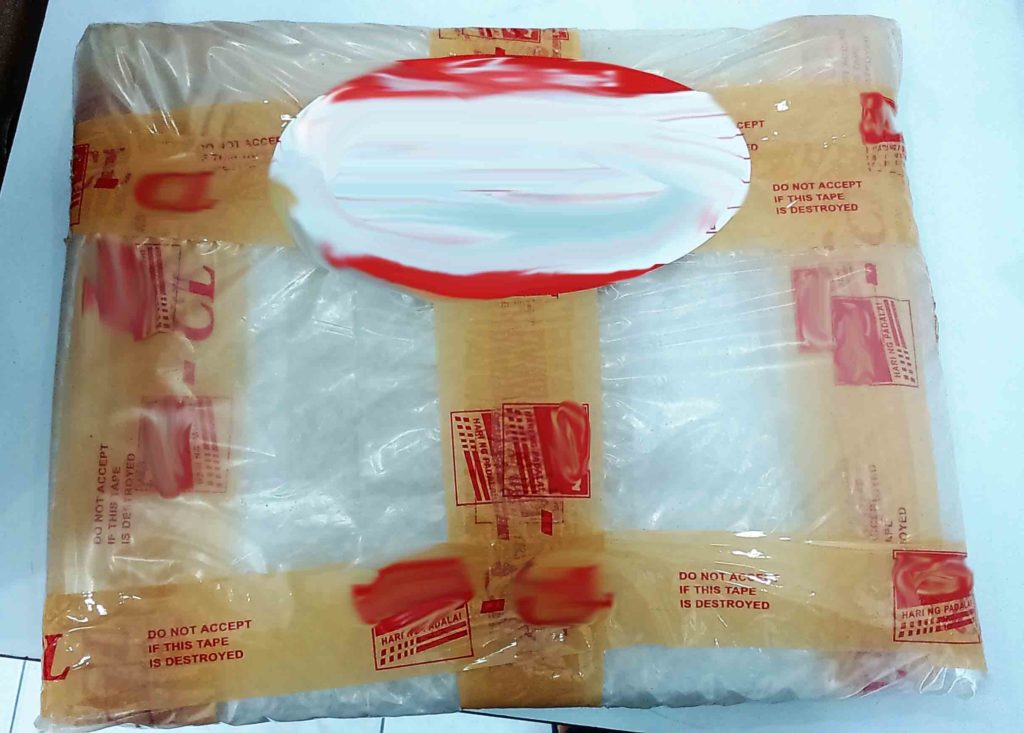
Prepping for sending via post or courier
Safe packaging
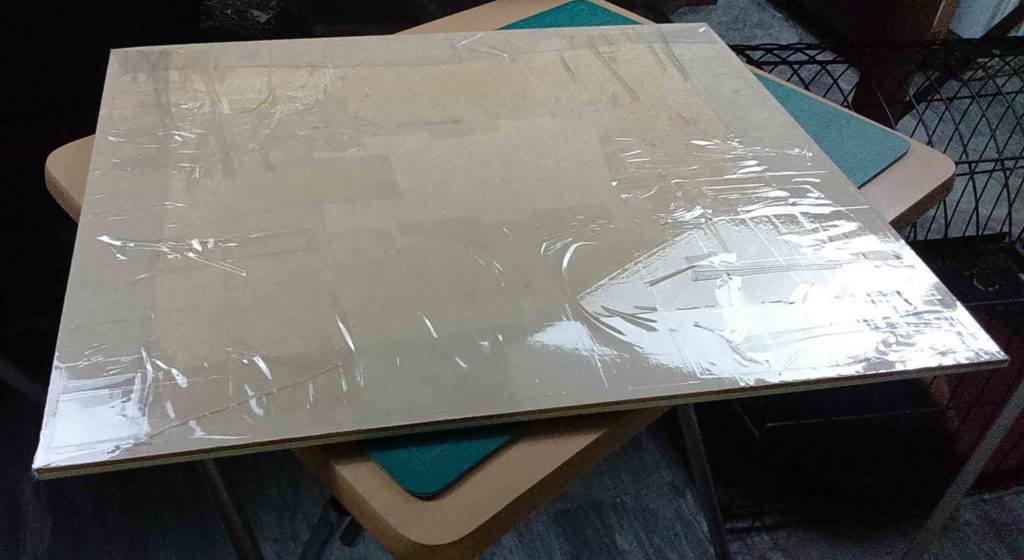
The matted presentation provides a bit of protection for your artwork. The plastic cover keeps the painting dry and dust free. You can easily wipe the plastic if it gets dirty. The passepartout also elevates the stretched plastic from the surface of the painting. By using an acid free baseboard to mount your painting, you protect it from direct contact with wood. The plywood backboard not only allows your set to stand on its own but protects the back of the painting too.
When transporting or sending by post or courier, you only need to worry about the front part which can easily be protected by another board or cardboard panel. Bubble wrap is optional but it helps buffer the corners and edges in case of accidental drops. Some couriers offer bubble wrapping aside from the free with the service final wrapping in plastic for an extra 20 Php per layer of bubble wrap.
Readying the set for framing
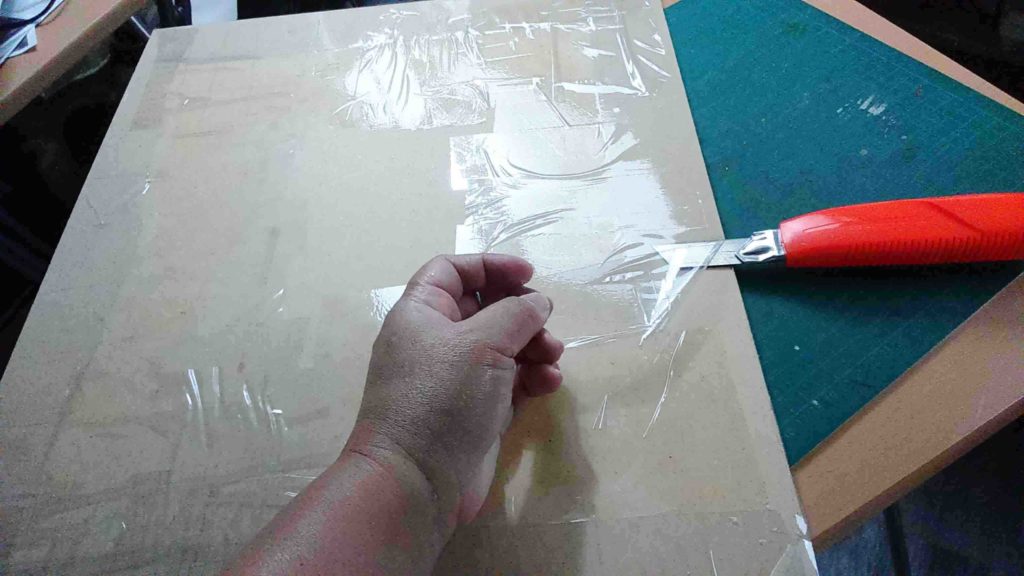
Removing the plastic safely
Turn the thing on its back. Make a small nick to insert your box cutter blade under the flap of plastic. Work the blade around. That would free the front part from the backboard.
Carefully remove the painting and the passepartout. Place these in a safe place while you clean the backboard of adhesives to ready it for use in the framing.
Removing the adhesive is easy. Just lift any corner and pull while holding the board with your other hand. Your matted set is now ready to be placed in the frame holder.
*Passepartout or passe-partout. Spelling source: https://en.wikipedia.org/wiki/Passe-partout