Archival Framing of Watercolors

Archival means the method used is reversible; that no permanent damage will be done to the artwork while being housed in the frame.  This can be used for watercolor and other media done on paper.  Advance thank you to Erwin Mallari and Rex Beo for sharing their knowledge on better framing which I incorporated here.

Materials needed: 

frame with glass
passepartout (mat with window)
Acid free board, Sintra or acid free foam core
wooden back panel (optional)
4 photo corners and or mounting strips
ruler
pencil
small nails or fletcher points
brown paper tape or crepe adhesive tape

The following will probably surprise you but wait til the end and you might just start adopting this system for your own framing:

Bingo chips or bottle caps
glue gun
foam sheets
double sided tape

Frame and glass

This is the main housing that displays and protects your artwork from dirt, dust and moisture.

Frames can be made of wood or of synthetic materials such as composite or plastic. If using wood, it is usually best to apply a protective coating such as primer and paint or if you want to go natural, use wax, as protection from moisture.  Bare wood can attract moisture from the air specially during the rainy season and may become the vehicle for moisture to get inside your framed work.

The glass may be of real glass or acrylic.  If you can afford it, the better kind has built in UV protection.

  1. Mat window
  2.  Mounting board
  3.  Back panel

Mat Window
The topmost layer or the layer next to the glass is the mat window.  This is ideally made of acid free board (100% cotton rag).  Remember, acid is the number one cause of discoloration or yellowing of papers.  Our goal is to maintain this acid free state of the artwork by minimizing or eliminating any contact with acidic surfaces.  The mat with window is not just for aesthetics, it also provides some space or clearance between the painting and the glass.  Most appreciated specially during the cold months when some glass develop condensation inside.  This clearance keeps that moisture from your painting’s surface.

Mounting board

Your mounting board is again ideally of 100% cotton rag.  However, if you cannot get a hold of an acid free board, the next best thing is a Sintra board or an acid free foam core.  Sintra board is neutral, practically waterproof and would keep moisture from the outside from getting inside the frame.  Foam cores have a middle layer that is waterproof and also buffers from outside moisture.  Take note though that acid free foam cores have at least 2 layers of clay coating on its surfaces and costs slightly more than the regular foam core.  The clay coating is important for making the surface neutral pH.  Use one of these three for the mounting base of your painting.

Back panel
If you are using the acid free board, you need the Sintra or the foam core as a buffer between it and a wooden panel.  You can actually do away with the wooden back panel if you find the Sintra or foam core provides enough support for the other layers.  Sometimes though on oversize paintings, you may need the extra bracing provided by wood panels.

Mounting your painting

New toy.  Acid free photo corners made from polypropylene plastic.  If you are in the Philippines, you can order these through galleon.ph.  Takes a few weeks to get here but worth the wait.  Hopefully, art stores or framers import these so we all have easy access to it in future.  This is again ideal but other options are available.  Check my post “matted presentation” which includes DIY tip for creating photo corners from scrap watercolor paper.

If you are curious though, a box of 500 pcs costs about 1000 Php. That includes shipping to my house.  So about 2 Php per piece.  You need only 4 corners per painting so that adds to just 8 Php additional for framing cost.   Find people to share a single box with.  It will not seem so expensive.


Recognize the painting?  Yes, Erwin’s.  He was also waiting word on the photo corners if they are good.  I told him I would use on the framed painting he gave to me and replace the tapes he used to mount the paper with the new photo corners.  Art Nebula Ph carries acid free tape.  You can check online at www.artnebulaph.com

Centering the artwork on the mounting board

One way to center is to place the mat with window on your mounting board without the painting.  Trace the window with light pencil.  Remove the mat.   Extend the lines.   I enhanced on the pic so you can see. Center the painting within the confines of the lines by using the corners as guide.

Attaching the photo corners

I probably have the driest hands because I scrub when I paint or handle paintings.

Remove a piece and stick to the tip of your pointer finger.  Try to touch only the smallest area possible to maintain maximum strength of the adhesive at the back.

Gently slide a corner into the sleeve

Slowly set the corner down.  The adhesive will lock the photo corner in place.  Do for the other three corners.

For a very small piece of photo corner, it functions very well.  This is a 9 x 12 inch painting.   It stayed put even when I upended the board.  The painting did not peel or fall off.  For bigger paintings, you may need to use the side mounts to provide more support.  The photo corners are also available in bigger sizes including a 3 inch kind with cutouts.

As for the sides, the passepartout or mat window will keep them down and flat.  Some adhesion action going on there also from surface to surface contact and pressure between the mat and mounting board.   I will let you know if I am wrong (if the painting inside goes askew while in the closed up frame.)

These are the mounting strips which you can use for bigger paintings.  You can cut to the length you need.

Costs about 800 to 900 Php, I think.  Available again through galleon.ph.  Expect around 3 weeks before you get it as they source it from abroad.   Costs more per piece than the photo corners but you only use to support bigger paintings.

So how strong is it?  An inch length was able to hold a 12 x 12 painting upright without peeling off.  And I used only a very small area of its adhesive.  Didn’t peel the backing all the way.  I think we are good here.

The same with the photo corners, you can remove the artwork free of residue and stains.  It comes off very clean.  You can put back in same way.  It will hold.

Now back to the other painting I was framing.  We put everything together.

  1.  Clean the glass checking for lints or dust.  You can use tape to pick up the white particles that almost always land on the glass.  A flashlight (torch) may come in handy.  Shine the light sideways and the particles will show.  Proceed to the next step when satisfied.
  2. Place your mat window in, right side facing the glass.
  3. Follow with the painting on the mounting board.
  4. Holding the frame securely, turn it over to check placement of the painting.  Check for lints or specks.  Remove, clean and adjust the painting placement if needed.  If all is clear, go to the next step.
  5. Add back panel (optional)
  6. Finish by using a point driver or small nails to secure the layers in place.

Close the gaps at the side which can become entry points for dust and insects with gummed paper tape or crepe tape (brown tape with adhesives).   For those not familiar, gummed paper tapes are the brown tapes you wet with water to activate the adhesive.  Supposed to be acid free, this is also used as tape when stretching watercolor paper.  I prefer this to the crepe tape as the latter turns sticky over time.

Finished frame looks neat like this at the back.  Attach the hooks for the hanging wire or string.

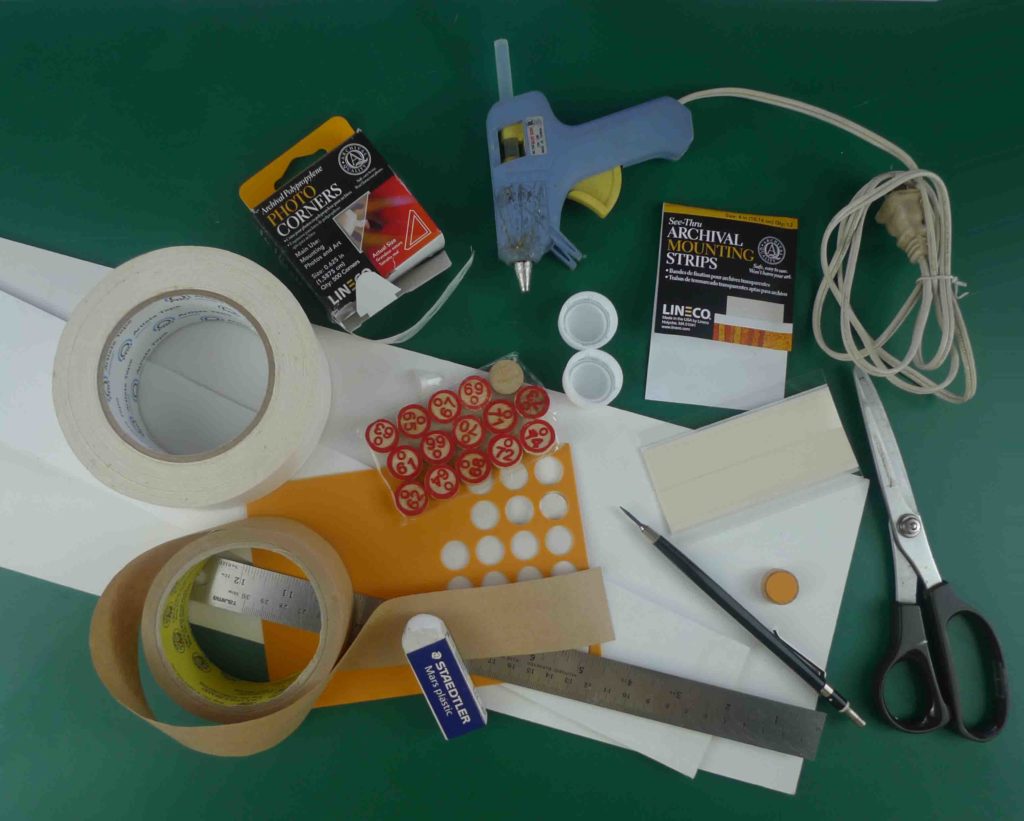
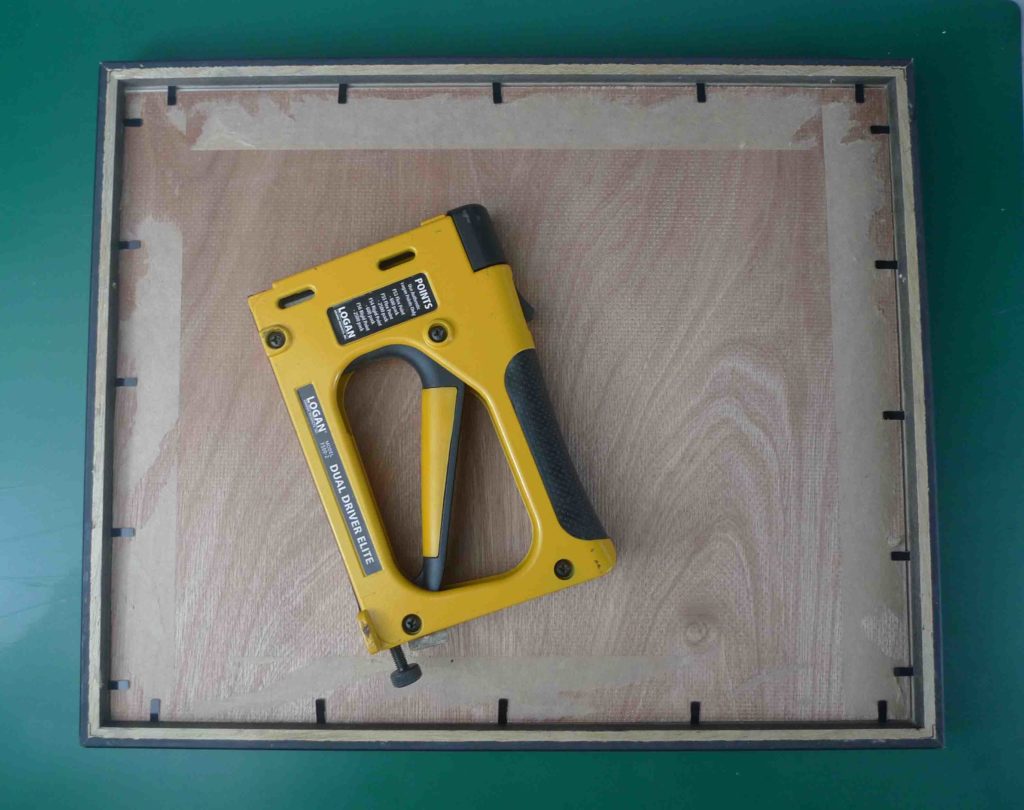
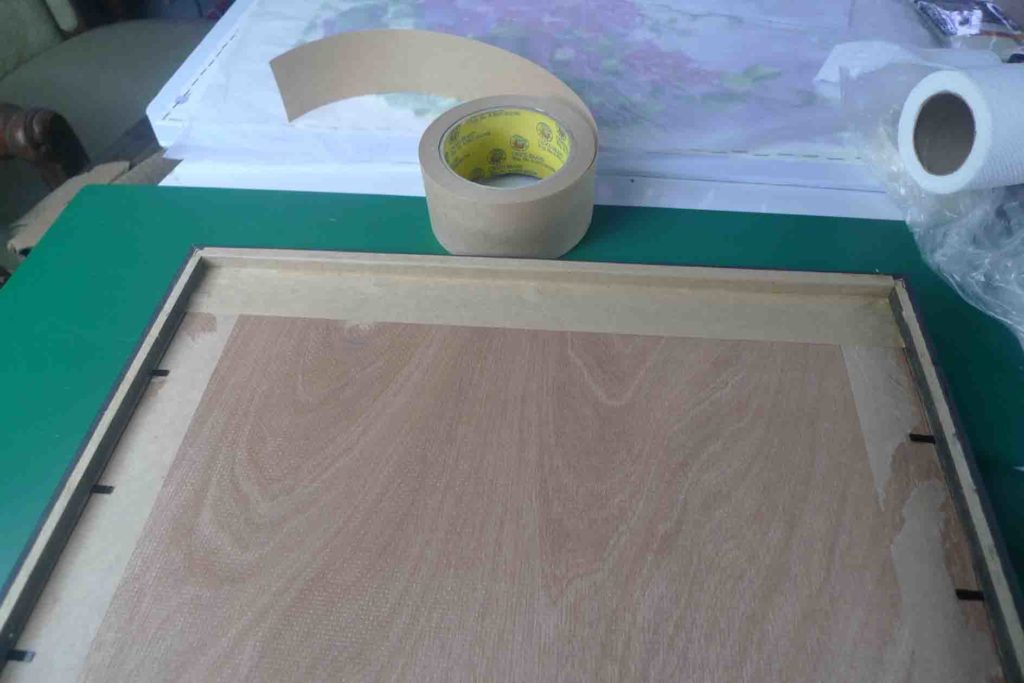
Now where do the bingo chips, bottle caps, glue gun, double sided tape and foam sheet come in?

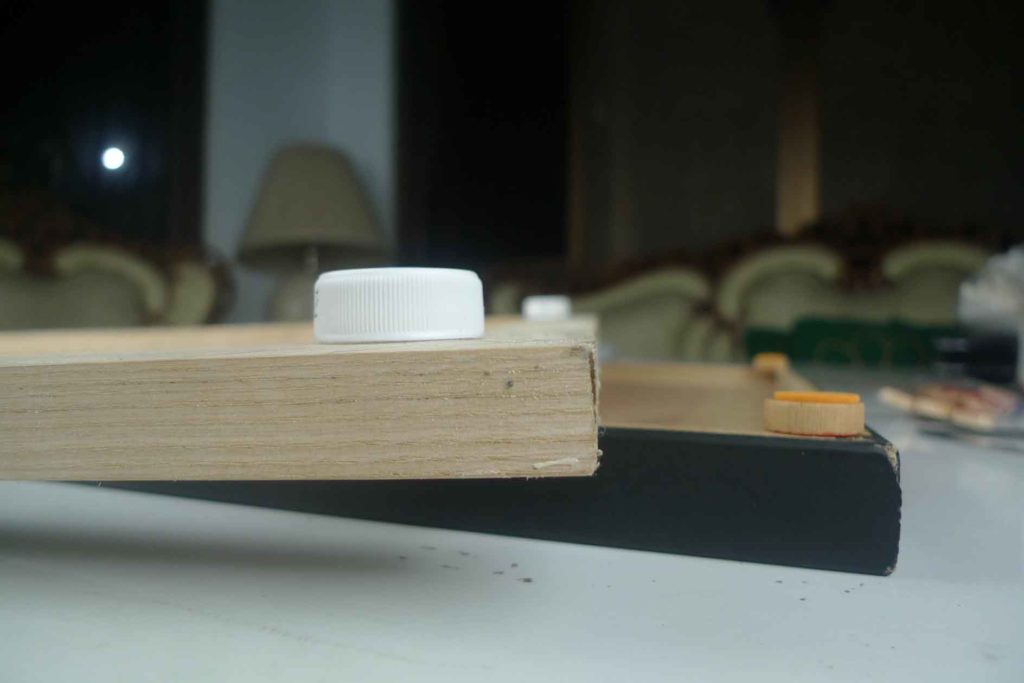
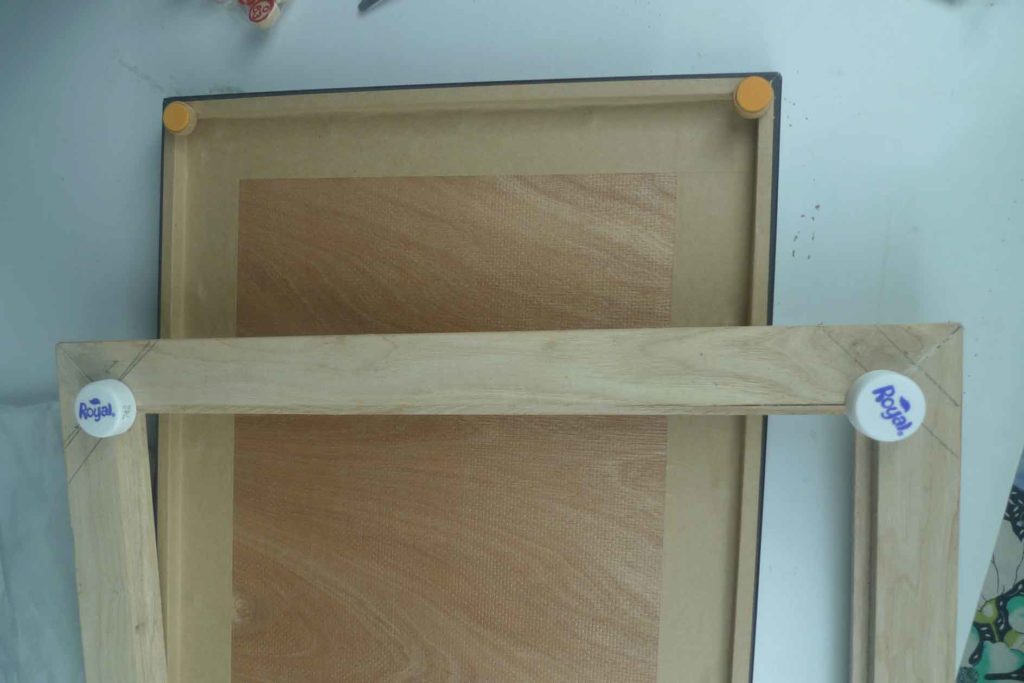
They are for elevating the framed painting off of the wall.

Walls perspire or at least can seem to.  You can test this.  Look for a wall that has an air conditioned room on the other side.  Place your palm against this wall.  It feels cold and sometimes condensation even form on your side of the wall.  Now imagine what can happen to a painting that hangs on this wall.  It can accumulate moisture just from surface to surface contact over time.*  By elevating the painting a fraction using bingo chips or with plastic bottle caps discretely placed at the back and out of sight, you not only minimize surface contact with the wall, you increase air circulation at the back too.  This keeps your back panel drier.  Since I started doing this a decade or so ago, I have never had problems with molds even during the very wet rainy season.

*Aircon test was shared by Kermit, master craftsman at my favorite frame shop in Bataan – Gerard’s Frame Station.

Picture shows approximate placement of bingo chips and bottle caps on frames.

I use bingo chips which can look more presentable for paintings that I sell.  I glue gun it to the corners slightly flushed inside so it wont show from the front and sides.  The foam sheet (orange) is optional but I find it protects the walls from the wooden stubs.

For paintings at home, I like using plastic bottle caps.  Bigger clearance space at the back.

This is a simple and cheap intervention but it can contribute to the longevity of your hanged paintings.  Works even for paintings on canvas.

The Framed Painting

Well, that’s it.  Thank you for reading through